
Guide
Connecting your Meraki organisation to ONbackup
Generate a Dashboard API key, connect your organisation, and run your first backup.
Applies to Cisco Meraki Dashboard API v1 · Last updated 17 July 2026
Overview
ONbackup is a Meraki network configuration backup platform that takes scheduled, versioned backups of every network and restores them in minutes. It connects to your estate through the Cisco Meraki Dashboard API — there are no agents to install and no hardware on site.
This guide walks through the whole journey: generating a Dashboard API key, adding it to ONbackup, what you will see if the key is rejected, confirming the connection, and running your first manual or scheduled backup. It takes about ten minutes.
What you will need Organization administrator access to the Meraki Dashboard, and an ONbackup instance you can sign in to. You do not need to enable API access first — the Dashboard API is enabled by default on all organisations.
Step 1 — Generate a Meraki Dashboard API key
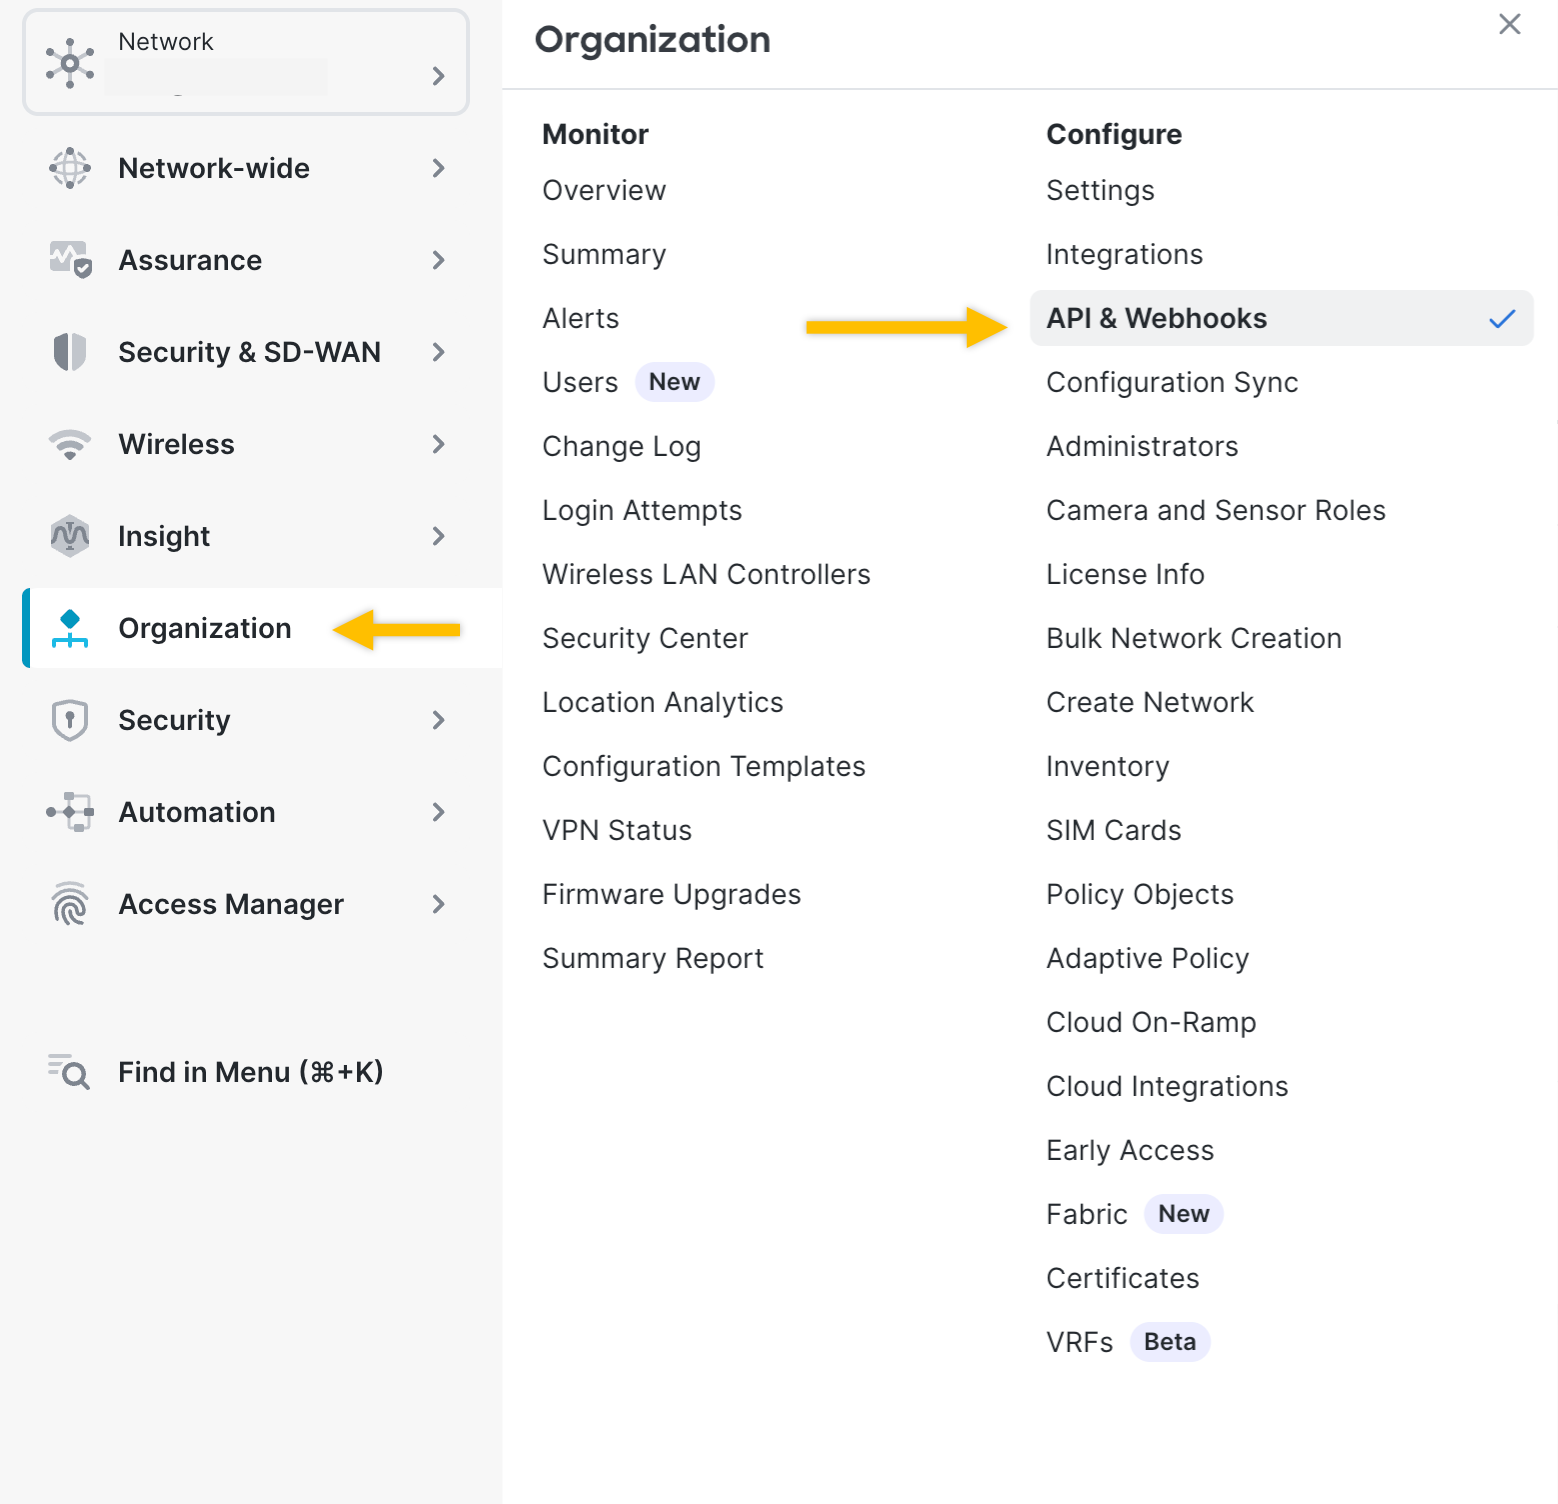
In the Meraki Dashboard, open Organization in the left-hand menu, then select API & Webhooks under Configure.
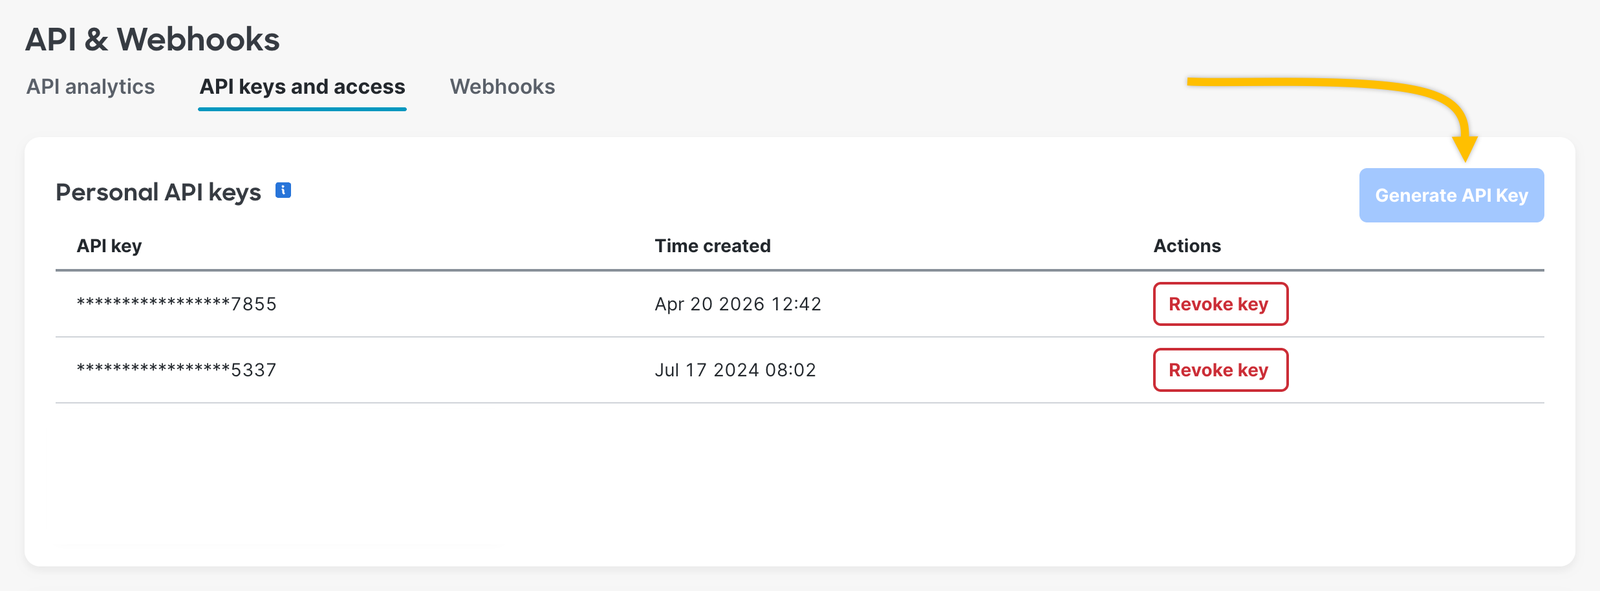
Open the API keys and access tab and select Generate API Key. Copy the key straight away and store it somewhere safe — Meraki shows it only once. If you lose it, revoke it and generate a replacement.
Read or write? An API key inherits the permissions of the account that generated it, for each organisation that account administers. A read-only administrator's key is enough to back up your networks, but restores will fail — writing a configuration back to Meraki requires an account with full (read-write) organisation access.
Use a dedicated service account Meraki API keys are personal: they are tied to an identity, not an organisation, and carry that person's access across every organisation they administer. Creating a named service-account administrator for ONbackup, with access scoped to only the organisations you want protected, keeps the blast radius small, keeps the audit trail clear, and means revoking the key never locks a colleague out.
Step 2 — Enter the key in ONbackup
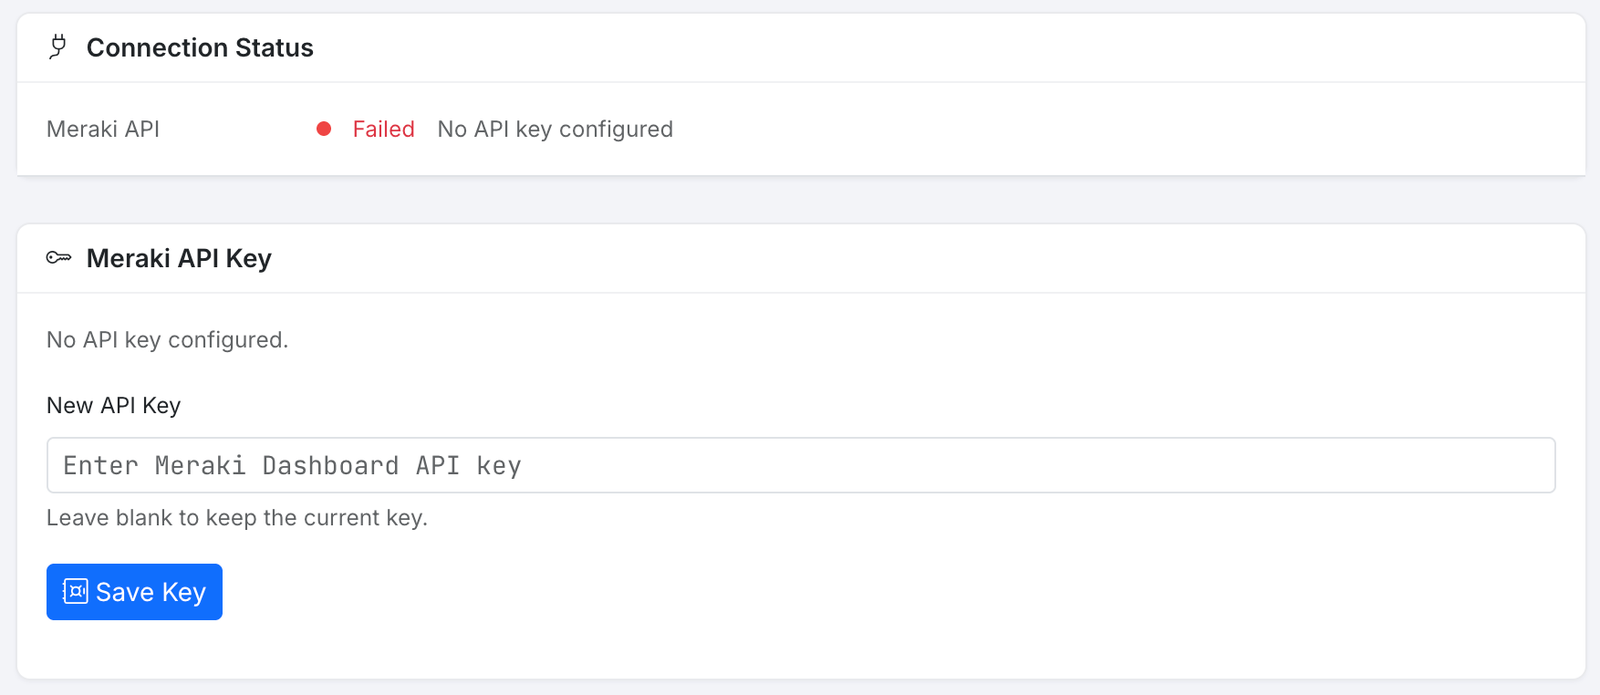
Sign in to ONbackup and open Configuration. Before a key is added, Connection Status reports Failed — No API key configured. This is expected on a new instance.
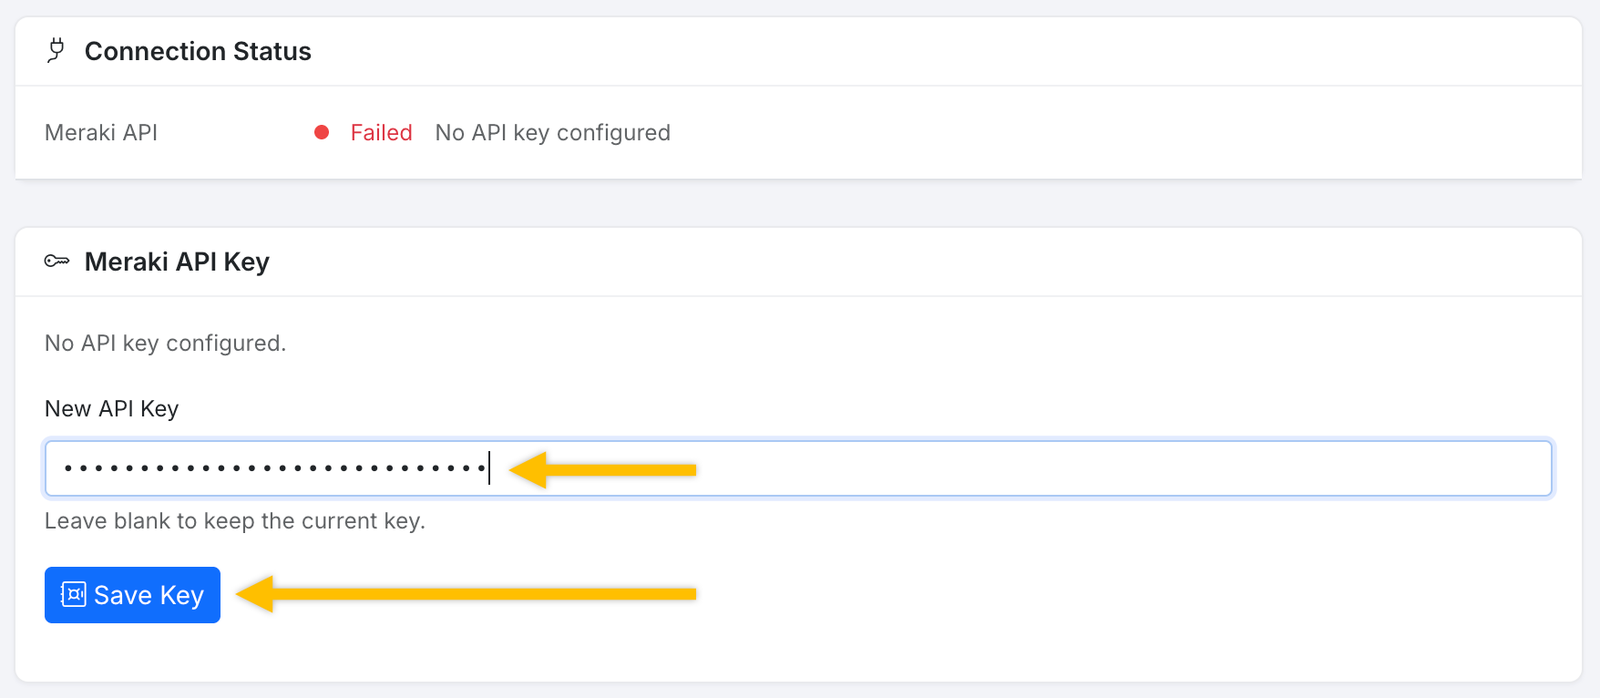
Paste your Meraki key into the New API Key field and select Save Key. ONbackup immediately tests the key against the Meraki API and reports the result.
Step 3 — If the key is rejected
If Meraki refuses the key, ONbackup saves it but reports the failure rather than hiding it. Connection Status shows Failed with the error Meraki returned — typically 401 Unauthorized — and the Meraki API Key panel shows Key saved but Meraki returned an error.
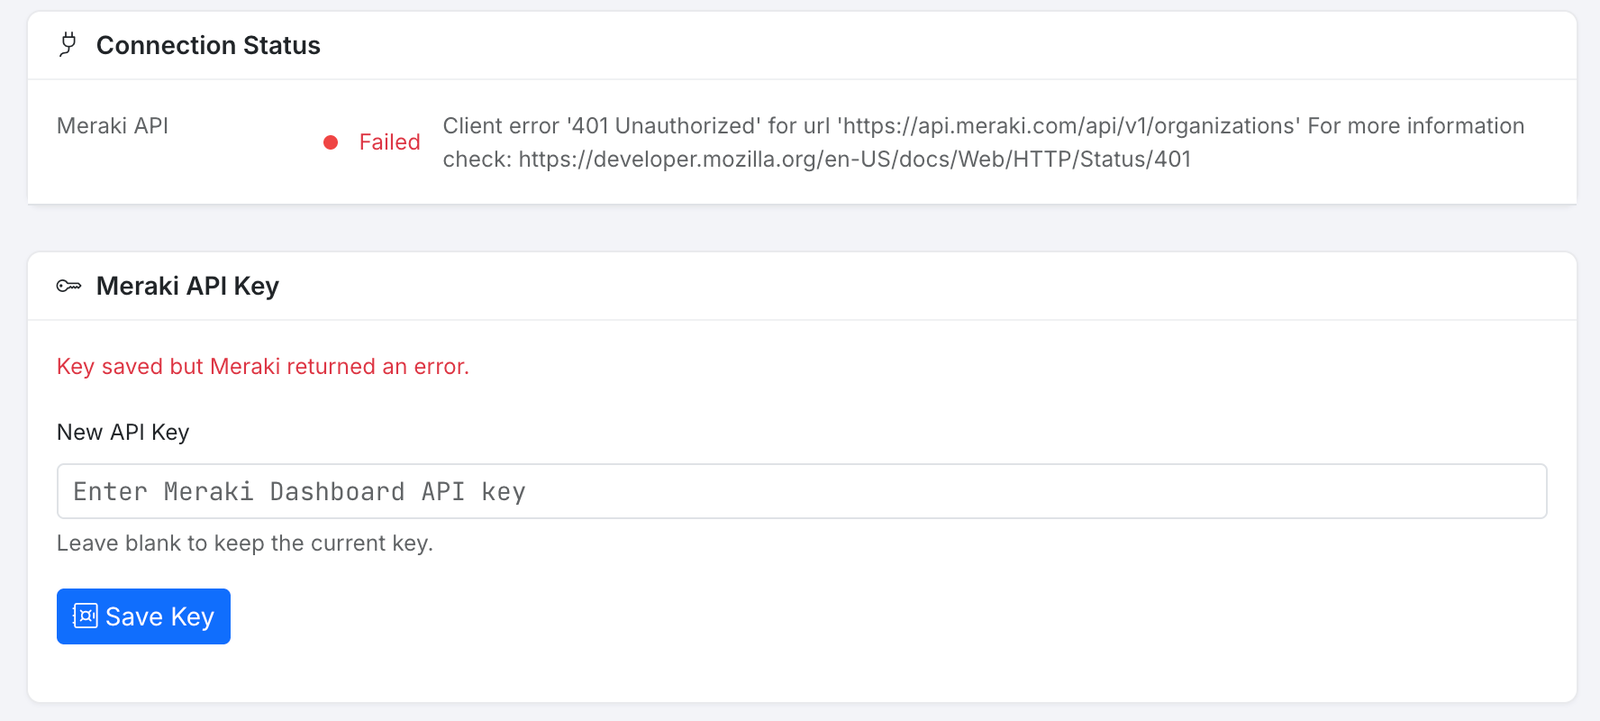
A 401 Unauthorized means Meraki did not accept the key. Check that:
- the key was copied in full, with no truncation or stray whitespace;
- the key has not been revoked in the Meraki Dashboard;
- the key belongs to an account that administers the organisation you want to protect; and
- you copied the key from the right account, if you administer more than one.
Correct the problem, paste the key again and select Save Key.
Step 4 — Confirm the connection
Once Meraki accepts the key, Connection Status switches to Connected and reports how many organisations the key can see. The Meraki API Key panel confirms the same and shows only the last four characters of the key.
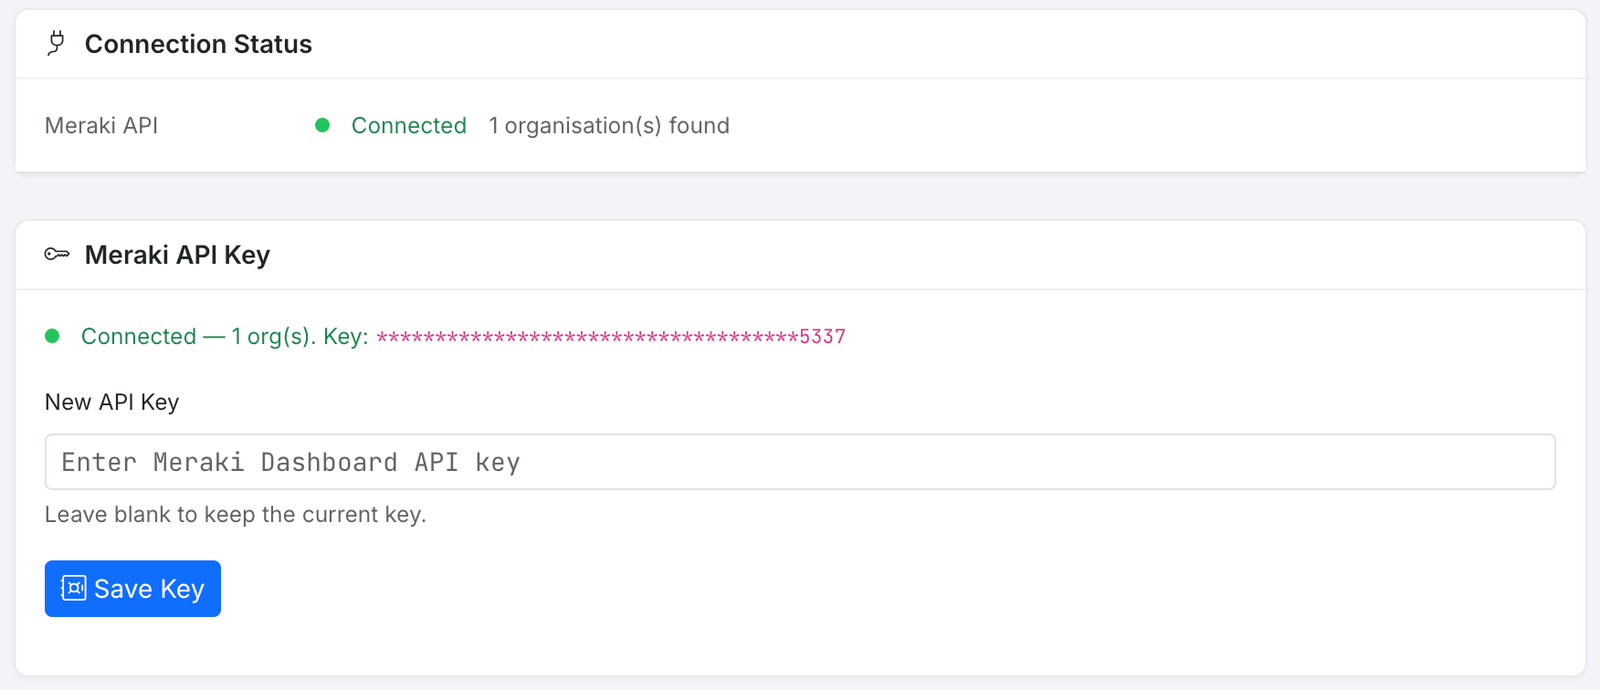
How your key is stored The API key is held in your instance's own Azure Key Vault and is never displayed in plain text or written to logs. Each customer has isolated storage and secrets — nothing is pooled or shared between customers.
Step 5 — Back up your networks
With the organisation connected, open the Backup page. ONbackup discovers your organisations and networks automatically — choose an organisation, then tick the networks you want to protect.
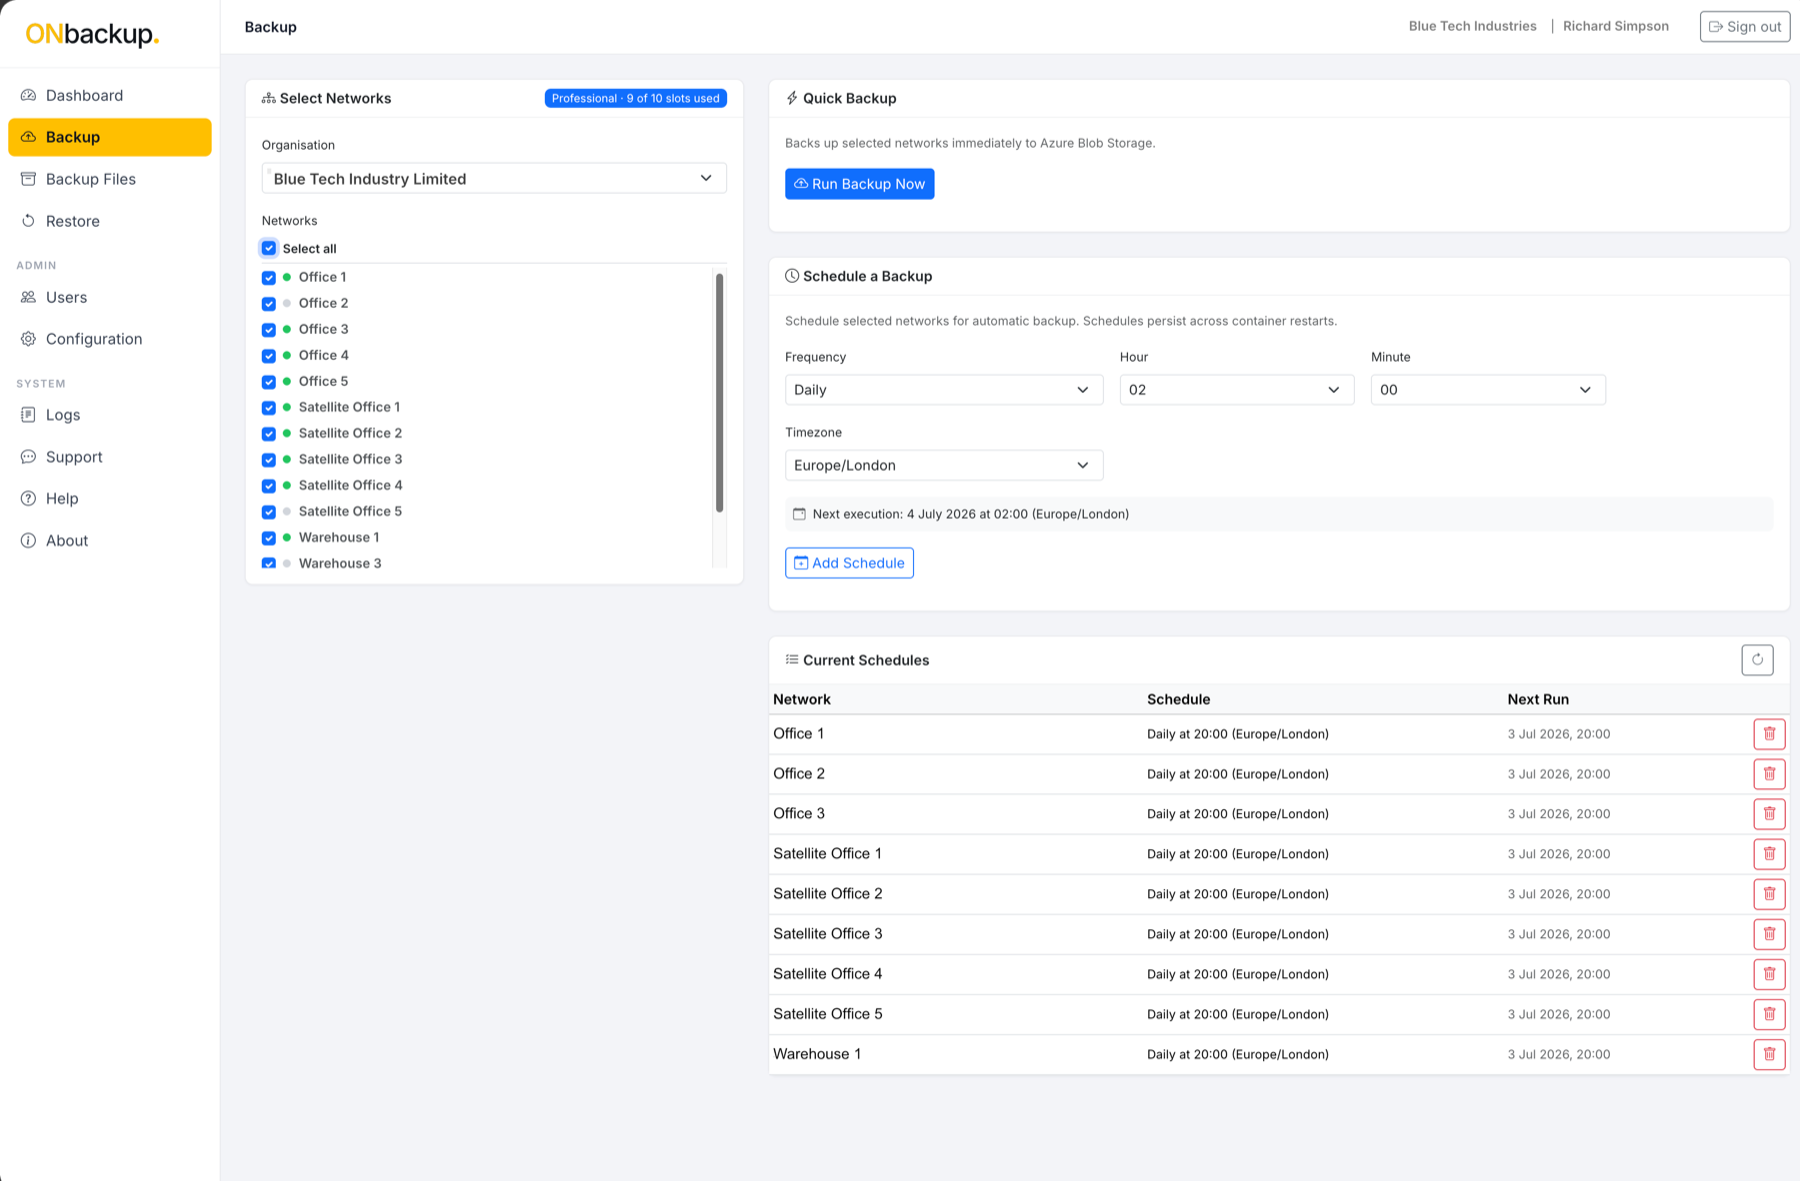
From here you have two options, and you can use both:
- Run Backup Now — backs up every selected network immediately. Useful before a change window, or to prove the connection end to end.
- Schedule a Backup — choose a frequency, hour, minute and time zone, then select Add Schedule. ONbackup confirms the next execution time, and schedules persist across restarts. Existing schedules are listed under Current Schedules, with their next run.
Each backup is a distinct, timestamped snapshot. You can browse them on the Backup Files page and restore from any of them on the Restore page.
System requirements
| Requirement | Detail |
|---|---|
| Meraki Dashboard API | v1 — enabled by default on all organisations; no action needed to turn it on. |
| Permission to generate a key | Organization administrator access to the Meraki Dashboard. |
| API key permissions | Read access is sufficient for backup. Write access is required for restore. A key inherits the permissions of the account that generated it. |
| API keys per identity | Maximum of two at a time. Revoke one to free a slot. |
| Supported product lines | MX security appliances, MS switches, MR wireless, and organisation-wide settings. |
| Network capacity | Standard 25 networks · Professional 50 · Enterprise 250. Larger estates quoted on request. |
| Hosting | Microsoft Azure, UK South. Isolated storage account and Key Vault per customer. |
| Authentication | Powered by Clerk, with multi-factor authentication on every sign-in and optional Google or Microsoft single sign-on. |
Rotating your key The two-key allowance exists so you can rotate without downtime: generate a second key, save it in ONbackup, confirm Connected, then revoke the old key in the Meraki Dashboard.
Support
ONbackup includes a searchable Help & Documentation Centre covering setup, features, licensing and retention, plus a built-in support system — raise a ticket without leaving the app and track it through to resolution.
For anything else, see what the Meraki Dashboard API can and cannot back up, or get in touch.
ONbackup is an independent service and is not affiliated with or endorsed by Cisco. Cisco, Meraki and related marks are trademarks of Cisco and/or its affiliates.